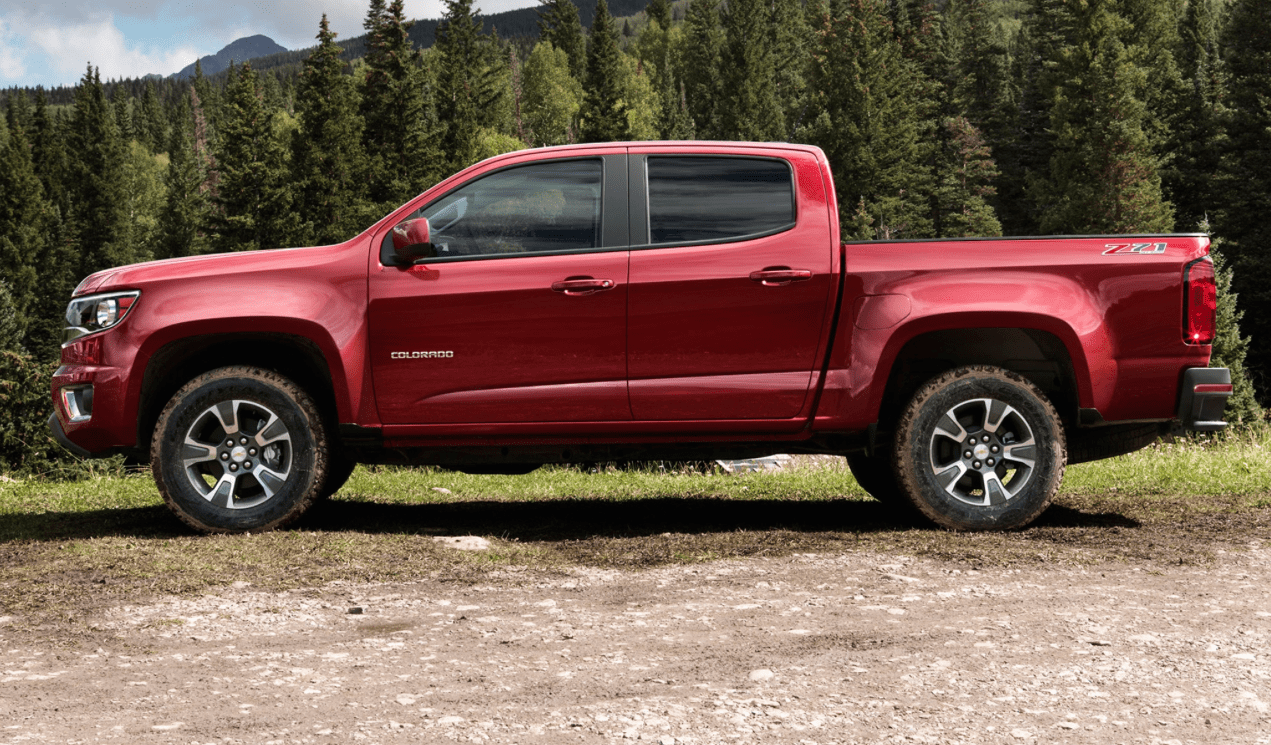
Rumored to produce 34 mpg with a tow rating of 7,700 lbs; this little truck stands alone.
The upcoming 2016 Duramax powered Colorado will hopefully set the bar for other domestic vehicle manufacturers. We could definitely use more compact diesel off road vehicles in here in the United States. You can view the full article on ExPo.
In January of 1886, Karl Benz with significant help from his wife Bertha Benz, created the World’s first automobile. Two years later Mercedes-Benz was born and the first internal combustion powered cars were available for sale. In 1896, Karl Benz was awarded a second patent for his latest invention: the “flat-engine”, also know as the boxer or horizontally opposed engine. From winning the first ever automobile race in 1894, to producing the first electric automobile in 1906, Mercedes-Benz continues to prove itself as an avante-garde in the industry in which it created. This forward thinking stands out to this day. Enter the Mercedes-Benz G 500 4x4².
Unlike most of MB’s understated AMG hotrods, the G 500 4x4² stands out like an exposed carpet tack. Even if you are unfamiliar with the G-Wagen you can tell something sinister is afoot. Visually, the Portal axles betray the otherwise subtle cues that MB worked so hard to tastefully blend into the package -cues such as the carbon fiber fender flare extensions, G 63/65 front bumper, or the LED lights that sit poised atop the corners of the windshield.
Looks would be nothing without the power to back it up. The direct injected, 4.0 l biturbo engine produces a strong 422 hp and 450 lb/ft of torque. Twin side exhaust pipes eliminate the rear muffler while providing a spot more ground clearance. MB intentionally created a throaty exhaust system that crescendos in intensity as the needle approaches redline. The cacophony of 8 cylinders firing in time is menacing enough to make sports car drivers think twice at traffic lights.
The additional 9.45 inches of ride height afforded by the Portals provides a total ground clearance of 17.72 inches. That’s more than enough clearance to pass over a cinder block standing on end without a scratch! At each corner you will find twin rally sport inspired shocks controlling the additional heft at each wheel while keeping the Portals in check. From the cockpit the driver can cycle through shock valving adjustments in as little as 15 milliseconds.
Passengers who successfully summit the high door sills will find themselves rewarded with the incredible comfort that Mercedes-Benz is known for -in spades. The seat bolsters, headrests, door armrests, center console and dash are adorned in white-stitch accented, black leather. The beautiful seats also receive diamond stitching and DINAMICA microfibre a material that is reproduced on the roof and body pillars.
Make no doubt about it, the Mercedes-Benz G 500 4x4² may be the little brother of the mighty G63 Brabus 6x6 but it certainly has learned to hold its own at the table. With any hope, MB will turn this concept into reality and make some lucky (and wealthy) few happy.
In the last installment we looked at some reasons why it is important to isolate auxiliary wiring from your vehicle's main harness. We also touched base on safe methods of doing so. In this post we will cover one method of adding an aftermarket fuse panel (in this case a Blue Sea model #5029). We chose to go the custom route.
Here is a list of items used to install the fuse panel in our 2012 Jeep JK 2 door.
1 sheet of 16ga weld steel from Lowes 8"x24"
1 Blue Sea fuse panel part #5029
Electric angle grinder and cutting disc (Harbor Freight)
Cordless drill and 0.25" drill bit
Template for bracket (DIY)
Rattle can car primer
Rattle can high temp gloss black paint (I prefer satin but already had the gloss)
1/4" ratchet and 10mm shallow socket
8ga wire x 1'.
2 8ga ring terminals
Wire crimpers
Heat shrink tubing and small torch
1 Sheet of 120 grit sandpaper to clean up the rough edges
Hardware to mount the fuse panel to the bracket
I didn't photograph the cutting of the bracket as it seemed a bit self explanatory. I used the drill bit described above for the mounting holes and cut the rest out with the angle grinder. I could have also used a jigsaw and a metal blade to make the cuts. The grinder is much easier to handle on such a small piece as jigsaws tend to push materials around the bench. You could use the mounting holes to secure the steel to a large piece of plywood in order to hold it still while you trim it. I recommend 1/4" plywood to do this as thicker pieces may make cutting curves more difficult. Either method works fine, just be careful, cut slow, and keep clothing and body parts away from power tools.
Oops! It looks like I leaned against the passenger side driving light. I ran two different lights up front, the driver side is a spot beam and the passenger side is a driving light. This permits a little of both worlds without taking up extra space.
The 45* notch above the fender mounting holes was made to clear the factory plastic mount. For cleanliness and to make a modification truly reversible, modify accessories around the vehicle rather than vice-versa.
I designed the bracket to line up with the fender, and contoured the fuse panel on the other side. Small details like this are easy to produce and can make a simple job look more professional.
Above you can see the reason for the notch. The bracket rests gently against the right side of the plastic bracket thus adding a bit of additional support.
Here you can see how the bracket contours the fuse panel.
Close-up shot of the panel and bracket installed.
Cover installed.
Overall, I'm pleased with how it turned out. I may have change a few things if I am ever inclined to make another.
As you can see here, there is at least 5/8" of clearance between the bracket and the factory battery -more than enough to keep the bracket from making contact with the battery while traveling off road.
With the bracket and fuse panel installed, next task: create a harness for the accessories then wire everything in. Stay tuned for Part III....
Click image above to see official product release on ARB's webpage.
The ARB fridge-freezer is arguably one of the overlander’s
best friends. Freedom from ice replenishment duties, perfect chardonnay temps
to convince your wife to come along for the trip, or perhaps it’s simply your
turn to bring the beer. Whatever your reason, a fridge-freezer is very
rewarding and useful luxury item.
One of the pitfalls to carrying a fridge inside the confines
of a vehicle are the inconsistent ambient temperatures it faces. At times you
may find yourself chugging along at highway speeds with the windows up and the
A/C blowing and other times your engine is off and the fridge is baking in the
sun. To make matters worse, fridge-freezers are almost never mounted in a
convenient location to monitor the temperature display effectively. So what’s
an overlander to do?
Until now, you were forced to check the temperature reading
in between fuel stops or upon arriving at camp. That’s where ARB’s new Remote
Fridge Monitor comes into play. This slick piece of kit wirelessly transmits
information to a small backlit display mounted in the cab of your vehicle. Information
is fed to the receiver via an easily mounted wireless transmitter. You now have the ability to
monitor compressor usage, internal temps and voltage all within the comfort of
the drivers seat. And if you find yourself with two fridges, you can monitor
the second fridge by purchasing an additional transmitter. At only $80 USD, it’s
a steal!
I was fortunate enough to have another article featured on Expedition Portal. This time it is a company profile of Uro-Camper, a Spanish based camper company that really produces a slick product.
Clicking on the image above will take you to their awesome Flickr feed.
Stopping for lunch just off of Shafer Trail, Utah.
We recently had our first experience with Easter Jeep Safari. You can read our editorial here on Expedition Portal. You don't have to be a member to read the article, but if you aren't already a member I highly recommend joining. You won't find a more welcoming group of like minded people. Give it a test drive.
Click the logo below to be taken directly to their homepage.


